Learning these shooting positions will help ensure you can cleanly and ethically harvest game under a wide variety of circumstances.
While many hunters do the vast majority of their shooting from a bench rest, this is not the best practice for taking shots under typical hunting conditions. Now I don’t know about you, but I’ve never taken a shot at a deer, or any other big game species for that matter, from a bench rest. Instead, I’ve used one of the primary shooting positions to take almost every big game animal I’ve ever harvested.
For this reason, it is important that hunters learn to shoot from positions they are more likely to use when hunting. Each shooting position has advantages and disadvantages and each is most useful under specific circumstances.
In today’s post, I’m going to go over the most useful shooting positions for hunters and describe the pros and cons of each one.
There are four primary rifle shooting positions most hunters and shooters use that I’ll discuss in this article. From least stable to most stable these positions are: standing, kneeling, sitting, and prone. All of these positions may be used both with and without additional external support, such as shooting sticks or a hasty sling, to help make an even more solid rest.
The descriptions of each position in this article are those that I’ve found are best suited for making an accurate shot while hunting and will not necessarily be the best choices for shooting in an NRA competition. Additionally, the exact details of each position listed here are the ones that work best for me, which may not be the best for you.
Luckily, there are several variations of each position that you may use in accordance with your equipment (like the type of hunting ear protection you choose to wear), flexibility, and the exact situation that you may find yourself in. Finally, keep in mind that I am left handed, so all of the photographs of me demonstrating these positions will need to be reversed for a right handed shooter.
Standing Shooting Position (Offhand)
The standing shooting position is the fastest shooting position to assume. The standing position also typically gives the hunter the best field of view, allowing him or her to see over all but the tallest grass and brush. Unfortunately, the standing position is also the least stable shooting position.
However, this is not really a problem when shooting at very close range (<50 yards). As a result, the standing position is most commonly used by hunters in thick woods who need to make a rapid shot (or follow up shot) at a relatively short distance. While the maximum range a hunter should shoot at using this position varies, I personally do not like to take a shot past 50 yards using an unsupported standing position.
During all of my years of hunting, I’ve only taken a handful of completely unsupported standing shots while hunting. However, every single one of them was at an animal that I encountered at very close range (5-20 yards) in very thick cover. In these situations, my ability to take a rapid shot was more important than assuming a more stable shooting position.
To assume the standing shooting position, position your feet roughly shoulder width apart and stand perpendicular to the target. Place your support hand under the rifle foreend with your elbow pointing down. Hold the grip with your strong hand with your elbow pointing out.
Standing Shooting Position With Support
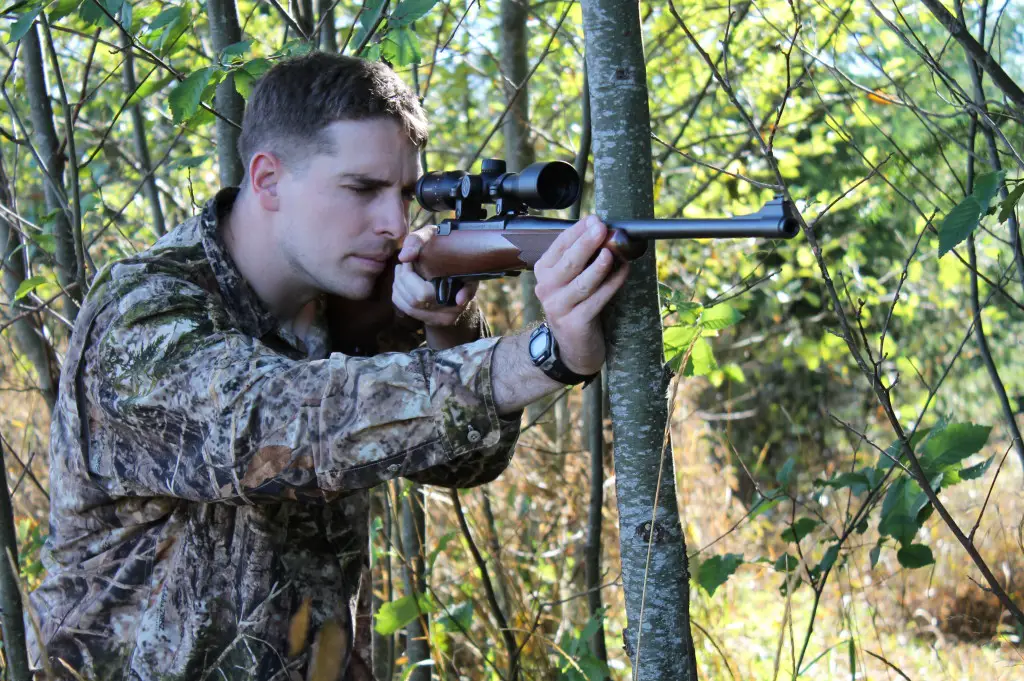
When possible, I use a supported shooting position. Support can come from a variety of sources: shooting sticks, a tree, etc. Of these, a tree is my favorite choice because I don’t have to carry it with me and there is almost always one within easy reach when walking through the woods.
When using a tree, or similar object, for support, simply take your non-dominant hand and form a “V” with your thumb and index finger. Cradle the stock of your rifle in the “V” and use your thumb to grip the tree and your fingers to grip the side of stock, pulling the rifle snugly against the tree. Depending on what side of the tree you are shooting from, you may reverse this configuration and use your fingers to grip the tree and your thumb to grip the stock. Either will work, it all depends on the situation and what works best for you.
Whatever you do, make sure that nothing touches the barrel of the rifle while you’re aiming, as this will negatively affect your accuracy.
Kneeling Shooting Position
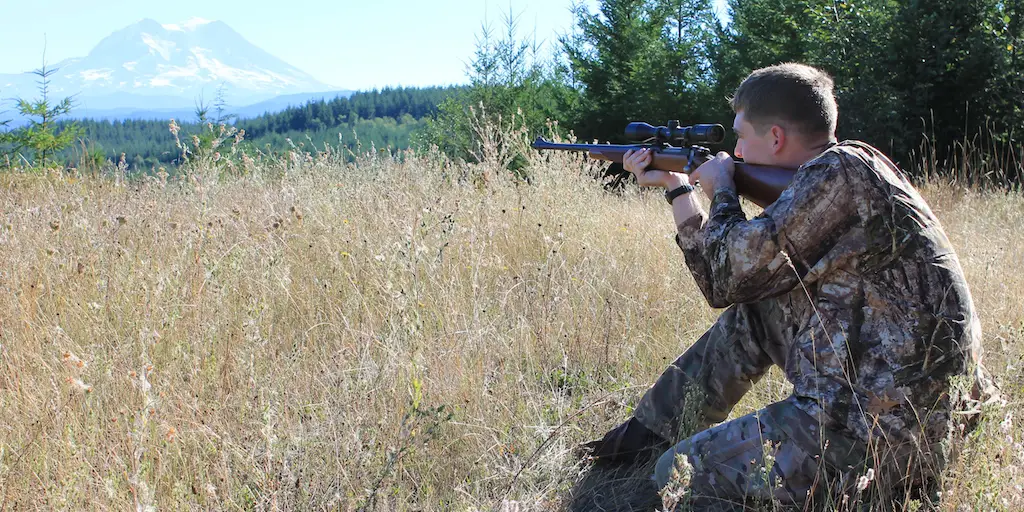
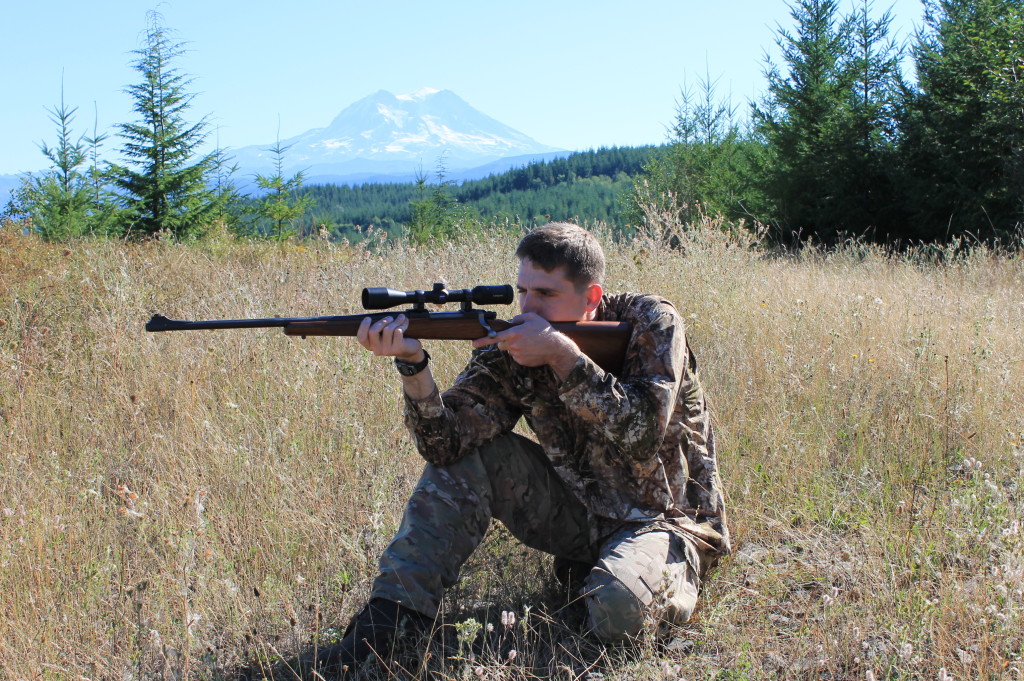
The kneeling position is the second fastest shooting position to assume. When done correctly, it provides a fairly stable shooting position. Unfortunately, only one elbow is supported when using the kneeling position, which is obviously not ideal. The kneeling position also gives the hunter the ability to see over brush, tall grass, and other things obscuring the target, though not as much as when standing. At the same time, the kneeling position also presents a smaller, more difficult to spot proile.
The kneeling position is a very good position to use when the hunter doesn’t have much time to take a shot. It’s also great for shooting over brush or grass obscuring the target when the prone or sitting positions unsuitable, but the target is too far away to take an ethical shot while standing.
To assume a kneeling position, place your dominant side knee on the ground at an approximately 90 degree angle from your non-dominant knee. If you can, turn your dominant side foot so that as much of it as possible contacts the ground, then sit on your foot. This will provide a more stable position than sitting on your heel. However, not everyone is flexible enough to do this, so do what works best for you.
Rest your support side arm on the front of your non-dominant knee using the flat, meaty part of your arm just above your elbow. Do not rest the “point” of your elbow on your kneecap, as this will provide a very unstable platform.
Though not demonstrated here, the kneeling shooting position may also be used in conjunction with other forms of support such as shooting sticks or a sling to make it more stable. When ample time and resources are available, it is always a good idea to use additional measures to assist you in stabilizing your position.
Sitting Shooting Position
The sitting position takes a little more time to achieve than the kneeling firing position, but is even more stable. Though the hunter’s line of sight is usually slightly lower when compared to the kneeling position, it is still typically high enough to see over most objects obscuring the target. This is usually the best shooting position to assume when the hunter has ample time to prepare for the shot, but the circumstances are not suitable for using the prone shooting position. The big advantage that sitting has over kneeling is that both elbows are supported instead of just one when kneeling.
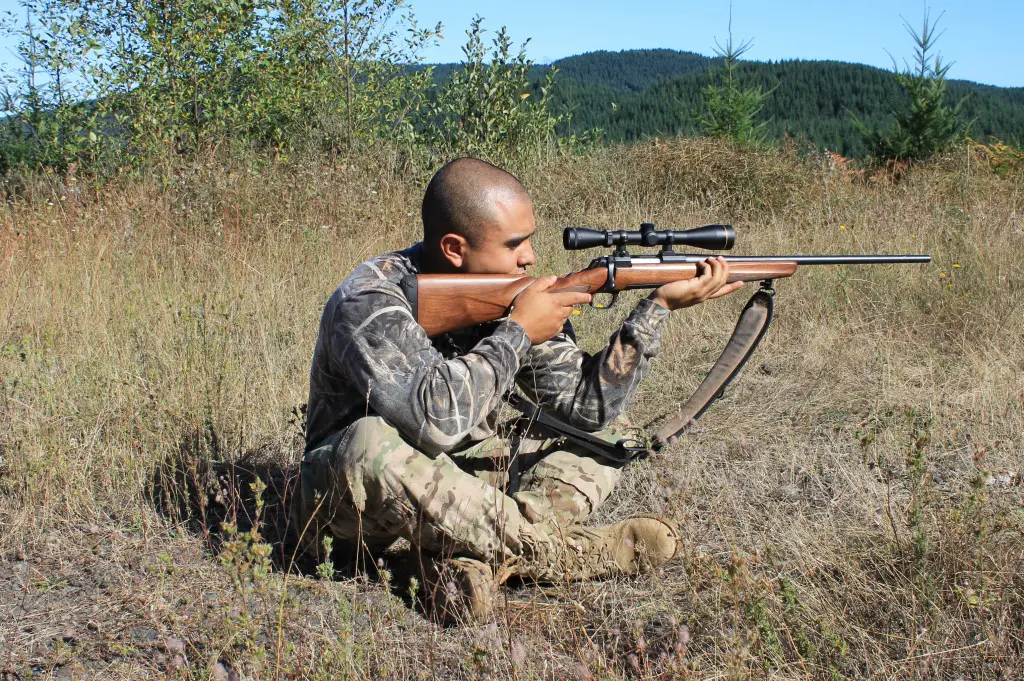
There are several variants of the sitting position, but here I’ll discuss probably the most common: cross legged. My friend Matt does a pretty good job demonstrating the sitting shooting position in the photograph below. He is sitting up high enough to see over the grass to his target, his elbows are properly braced against his legs, and the stock of his rifle is tucked tightly into his shoulder.
To assume a sitting shooting position, sit down cross legged and pull both legs as close to the body as you can. The idea is to get as close to the ground as possible. Push your knees down as far as you can, lean forward, and rest the flat, meaty portion of both of your arms just above your elbows in front of your knees. Just like when shooting from the kneeling position, do not rest the “point” of your elbow on top of your knee.
The sitting position is usually uncomfortable the first few times you try it. However, the more you practice, the more comfortable it will become. When used properly, the sitting position can be nearly as stable as the prone position and experienced shooters can shoot accurately at long range using this shooting position. Additionally, like the kneeling position, the sitting shooting position may also be used in conjunction with a sling, shooting sticks, a bi-pod, or some other form of support to make it even more stable.
Unsupported Prone Shooting Position
The prone position is the slowest position to achieve, but it is the most stable. Since the hunter is so close to the ground when prone, this makes it easier to hide from game without being spotted. However, this also makes it difficult for the hunter to see the target if there is any grass or brush in the way. Because of these disadvantages, the prone position is only the best choice when there is plenty of time to prepare for the shot and when there are no objects in the way to obscure the target.
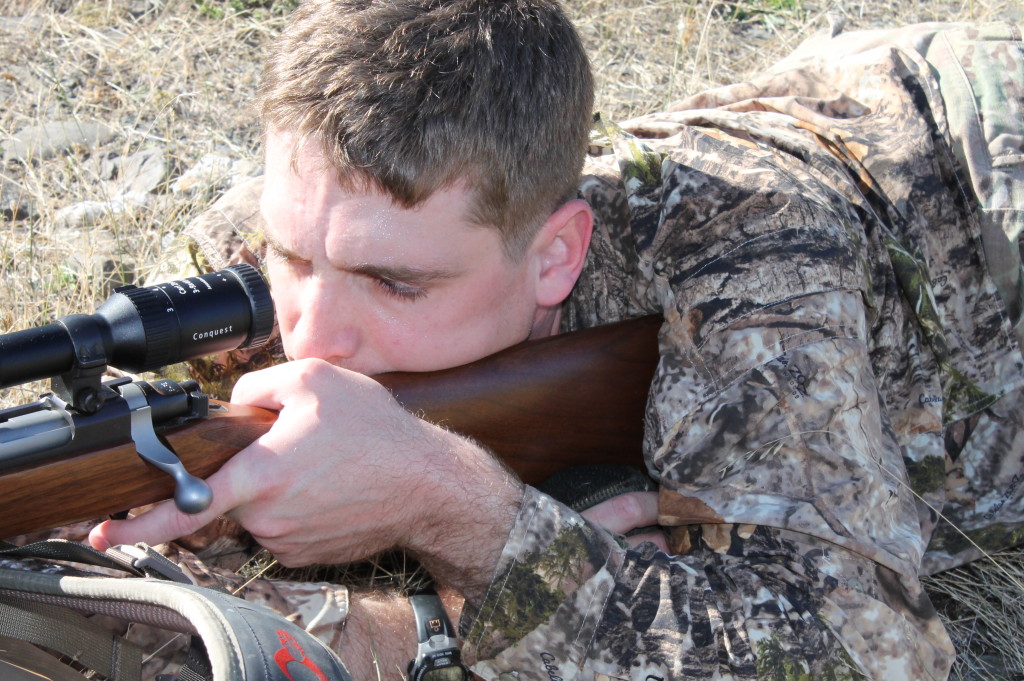
To get into the prone shooting position, assume the push-up position behind your rifle. Then, lower your body to the ground straight behind your rifle with your non-dominant hand supporting the forend of the rifle, as close as possible to being directly below it. Next, spread your legs and point your toes outward with your ankles flat on the ground. Not everyone will be able to do this, but the idea is to get as much of your body as possible in contact with the ground. Then, pull the butt of the rifle firmly into the pocket of your shoulder with your dominant hand and adjust your position slightly as necessary to ensure you get good sight alignment and a stable sight picture.
Prone Shooting Position With Support
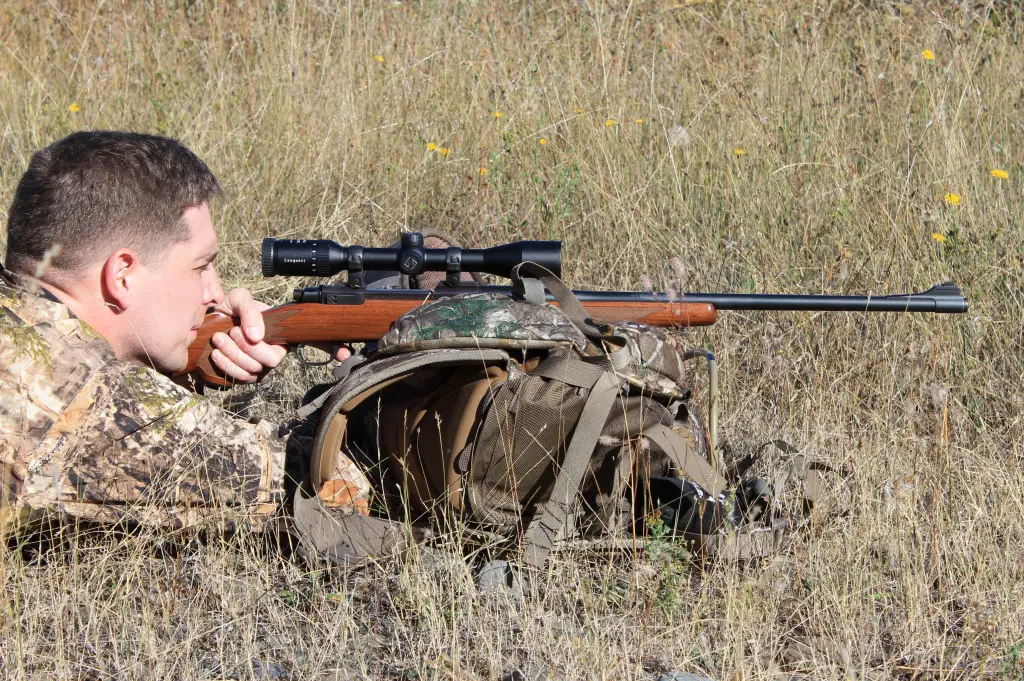
Though it is possible to shoot from the prone position in both a supported and unsupported manner, if you have enough time to get into a good prone shooting position, then you likely have enough time to use some form of support. Doing so will dramatically increase your stability and make shooting at long distance much easier. Support can encompass a wide range of objects such as a backpack, a log, or a bi-pod.
When using a “soft” form of support, such as a backpack, place the forend of the rifle directly on it. When shooting across something harder, like a log or a rock, it may help to place some form of padding between the rifle and the object, such as a rolled up jacket. As always, do not let anything directly touch the barrel, as this will adversely affect your accuracy.
Additionally, it is always a good idea to use some form of support beneath the rear of the rifle’s stock if possible. You can purchase a purpose built mono-pod or shooting bag for this purpose, or you can just use an old sock filled with sand or beads. Using your support hand, place the bag beneath the rear sling swivel and increase or decrease pressure on it to depress or elevate your muzzle. Using a rear bag makes the prone shooting position even more stable and a good shooter is capable of excellent accuracy when using one.
Keep in mind that, while various shooting positions are favored in different parts of the world (like shooting from the prone on a New Zealand hunting trip or standing from shooting sticks on an Africa hunting safari) there is no single “best”shooting position for all hunting situations. Each position has strengths and weaknesses and it is up to the hunter to choose the position that allows him or her to take the most accurate and ethical shot.
For this reason, it is important that you are familiar with several different shooting positions and have practiced them during the off season. This will enable you to determine exactly which positions work best for you so you can assume the most appropriate shooting position quickly and make a good shot when it counts.
Enjoy this article on the best shooting positions for hunters? Please share it with your friends on Facebook and Twitter.
Make sure you subscribe to The Big Game Hunting Podcast and follow The Big Game Hunting Blog on Facebook, Instagram, Twitter, and YouTube.
NEXT: HOW TO SIGHT IN A RIFLE WITH A SCOPE
NEXT: BEST GIFTS FOR HUNTERS
John McAdams is a proficient blogger, experienced shooter, and long time hunter who has pursued big game in 8 different countries on 3 separate continents. John graduated from the United States Military Academy at West Point and is a veteran of combat tours with the US Army in Iraq & Afghanistan. In addition to founding and writing for The Big Game Hunting Blog, John has written for outdoor publications like Bear Hunting Magazine, The Texas State Rifle Association newsletter, Texas Wildlife Magazine, & Wide Open Spaces. Learn more about John here, read some of John’s most popular articles, and be sure to subscribe to his show: the Big Game Hunting Podcast.


I personally am a fan of the kneeling shooting position. I am the most comfortable in this form and the most accurate. If I am doing the standing then I need something to lean up against to keep myself stable.
Wow! This article is packed full of info. I thought myself a pretty solid shooter but I picked up a few tips in here that I’ll be using in the field for sure. Keep ’em coming!
Your tips for shooting positions are excellent and the photos are equally well done.
I would be grateful for your permission to include the four photos – sitting, prone, kneeling and standing – in an update of our training course.
I like how you said that it’s very important to master these. I agree because if you don’t you could mess up when it really matters.
Nowadays I only shoot offhand at 100 and 200 yards-unless sighting in or testing loads and trajectory POI.Some times I’ll practice off sticks to get used to overcoming the bounce. I figure any kind of support is a breeze after that. I can shoot clovers or bug holes like any one else if the rifle is up to it. Besides I don’t care if i don’t shoot them either. I do love when on a good day I start to shoot 3″ groups at 200 yards though. I go to 200 offhand just to maintain confidence.And I would use support on every hunt unless it was 100 yards or less. Even then if there is time. Anything 300 yards and further you really need to have good support.for any true progress.